业务方反馈系统的定时邮件没有收到。排查日志后发现,是人员离职后,其工作邮箱关闭,与其相关的业务系统的定时邮件通知的收件人列表内没有移除其邮箱,会导致邮件通知发送失败报”550 5.1.1 recipient is not exist”异常,导致整个邮件通知都没办法发出。 经过查阅文档发现可以设置允许发送部分邮件。可以通过设置属性mail.smtp.sendpartial或者通过SMTPMessage的sendPartial属性来实现。
npm config set registry https://registry.npm.taobao.org/ npm config set disturl https://npm.taobao.org/dist npm config set electron_mirror https://npm.taobao.org/mirrors/electron/ npm config set sass_binary_site https://npm.taobao.org/mirrors/node-sass/ npm config set phantomjs_cdnurl https://npm.taobao.org/mirrors/phantomjs/ npm config set chromedriver_cdnurl https://cdn.npm.taobao.org/dist/chromedriver/ npm config set operadriver_cdnurl https://cdn.npm.taobao.org/dist/operadriver npm config set fse_binary_host_mirror https://npm.taobao.org/mirrors/fsevents
yarn config set registry https://registry.npm.taobao.org -g yarn config set disturl https://npm.taobao.org/dist -g yarn config set electron_mirror https://npm.taobao.org/mirrors/electron/ -g yarn config set sass_binary_site https://npm.taobao.org/mirrors/node-sass/ -g yarn config set phantomjs_cdnurl https://npm.taobao.org/mirrors/phantomjs/ -g yarn config set chromedriver_cdnurl https://cdn.npm.taobao.org/dist/chromedriver -g yarn config set operadriver_cdnurl https://cdn.npm.taobao.org/dist/operadriver -g yarn config set fse_binary_host_mirror https://npm.taobao.org/mirrors/fsevents -g
使用在线更新 dorado 规则时,项目报错org.springframework.security.web.firewall.RequestRejectedException: The request was rejected because the URL contained a potentially malicious String "//". 这个是由Spring Security 5提供的一个HTTP防火墙,拦截可疑访问导致的。在项目中注册如下的bean,即可替换系统默认的防火墙。该实现没有任何防范作用,建议仅仅再更新Dorado规则时临时打开,一定不能发布到生产环境。
1
2
3
4
5
6
@Bean public HttpFirewall looseHttpFirewall() { StrictHttpFirewallfirewall=newStrictHttpFirewall(); firewall.getEncodedUrlBlacklist().clear(); return firewall; }
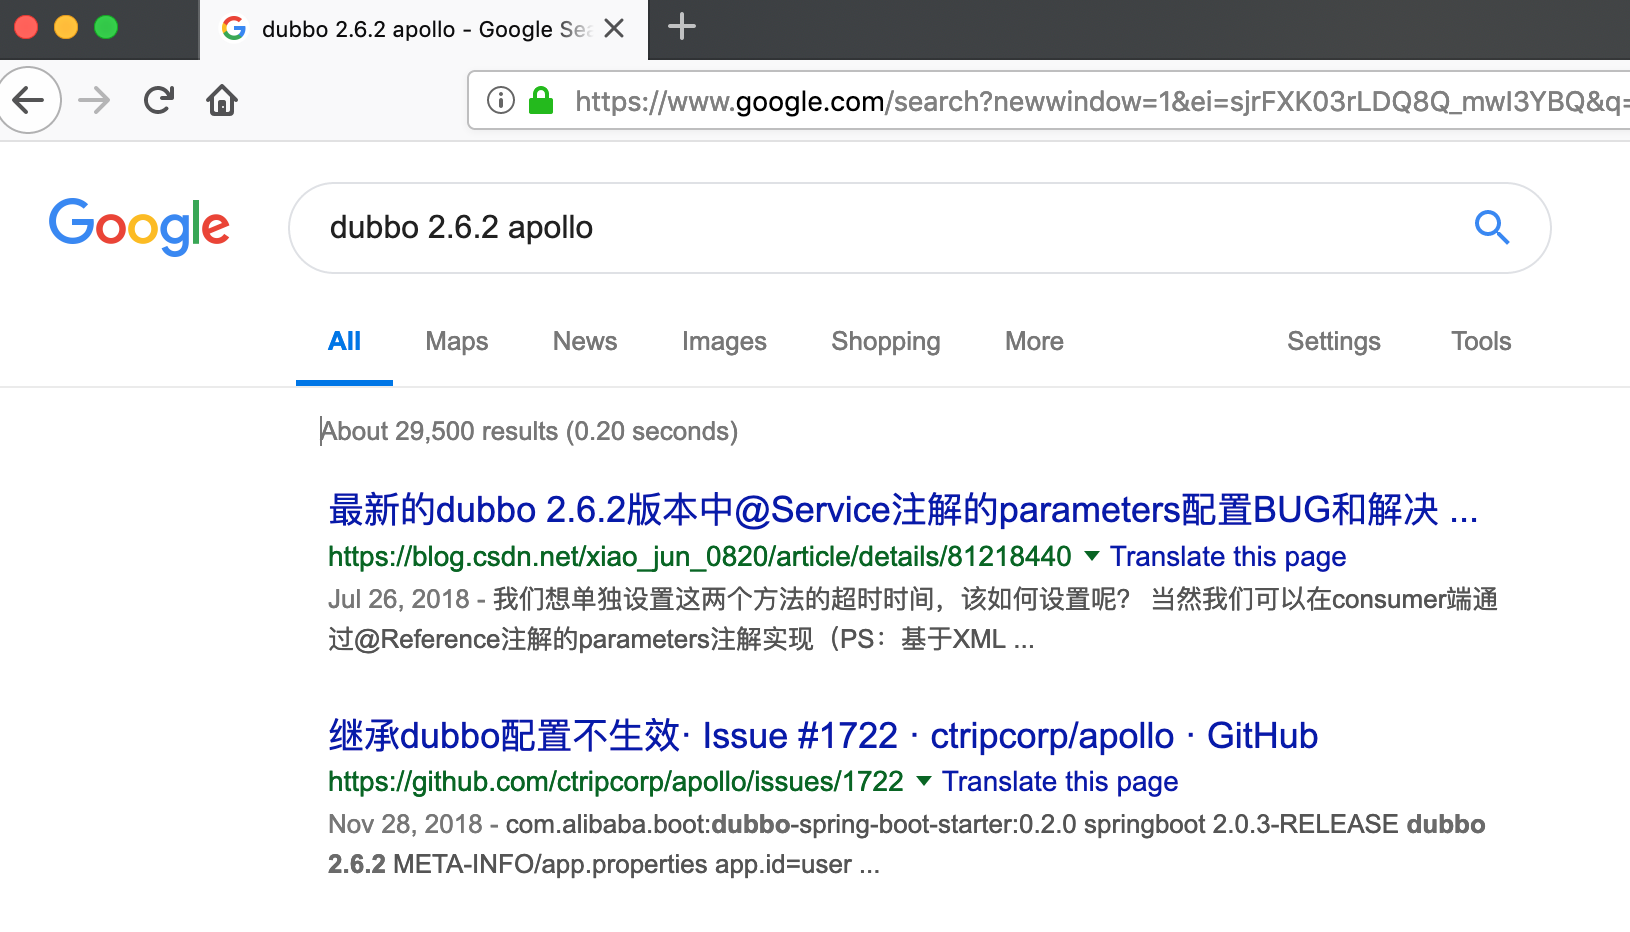
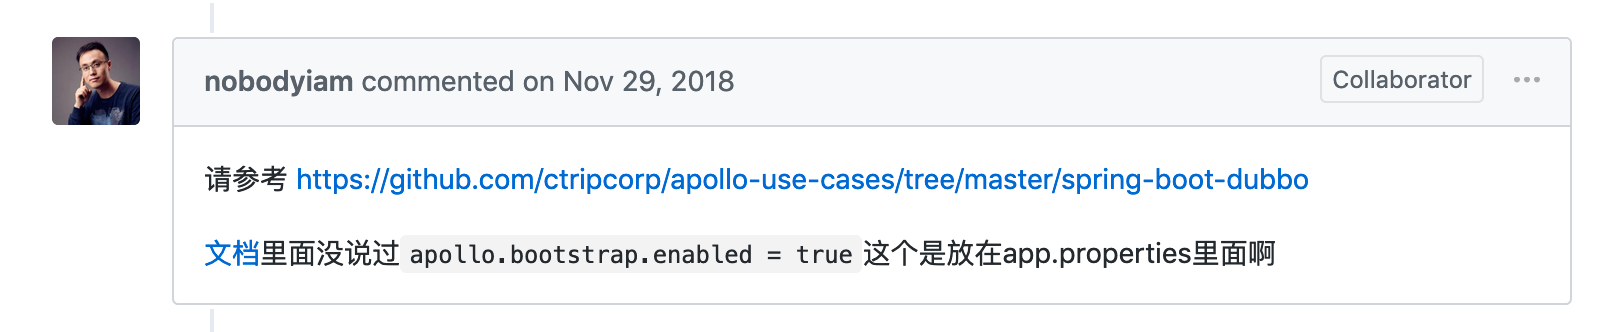
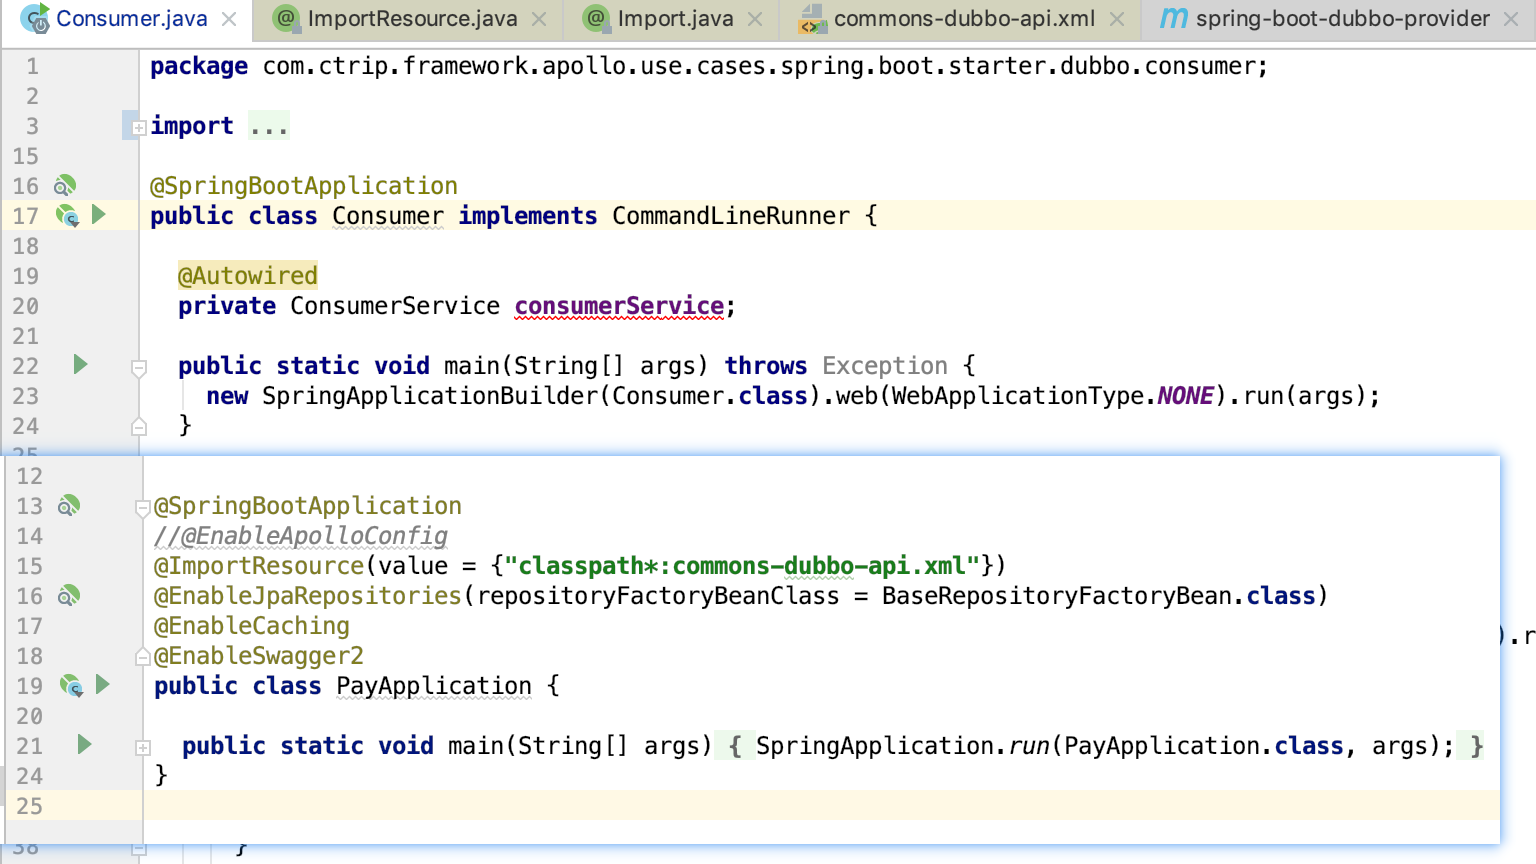
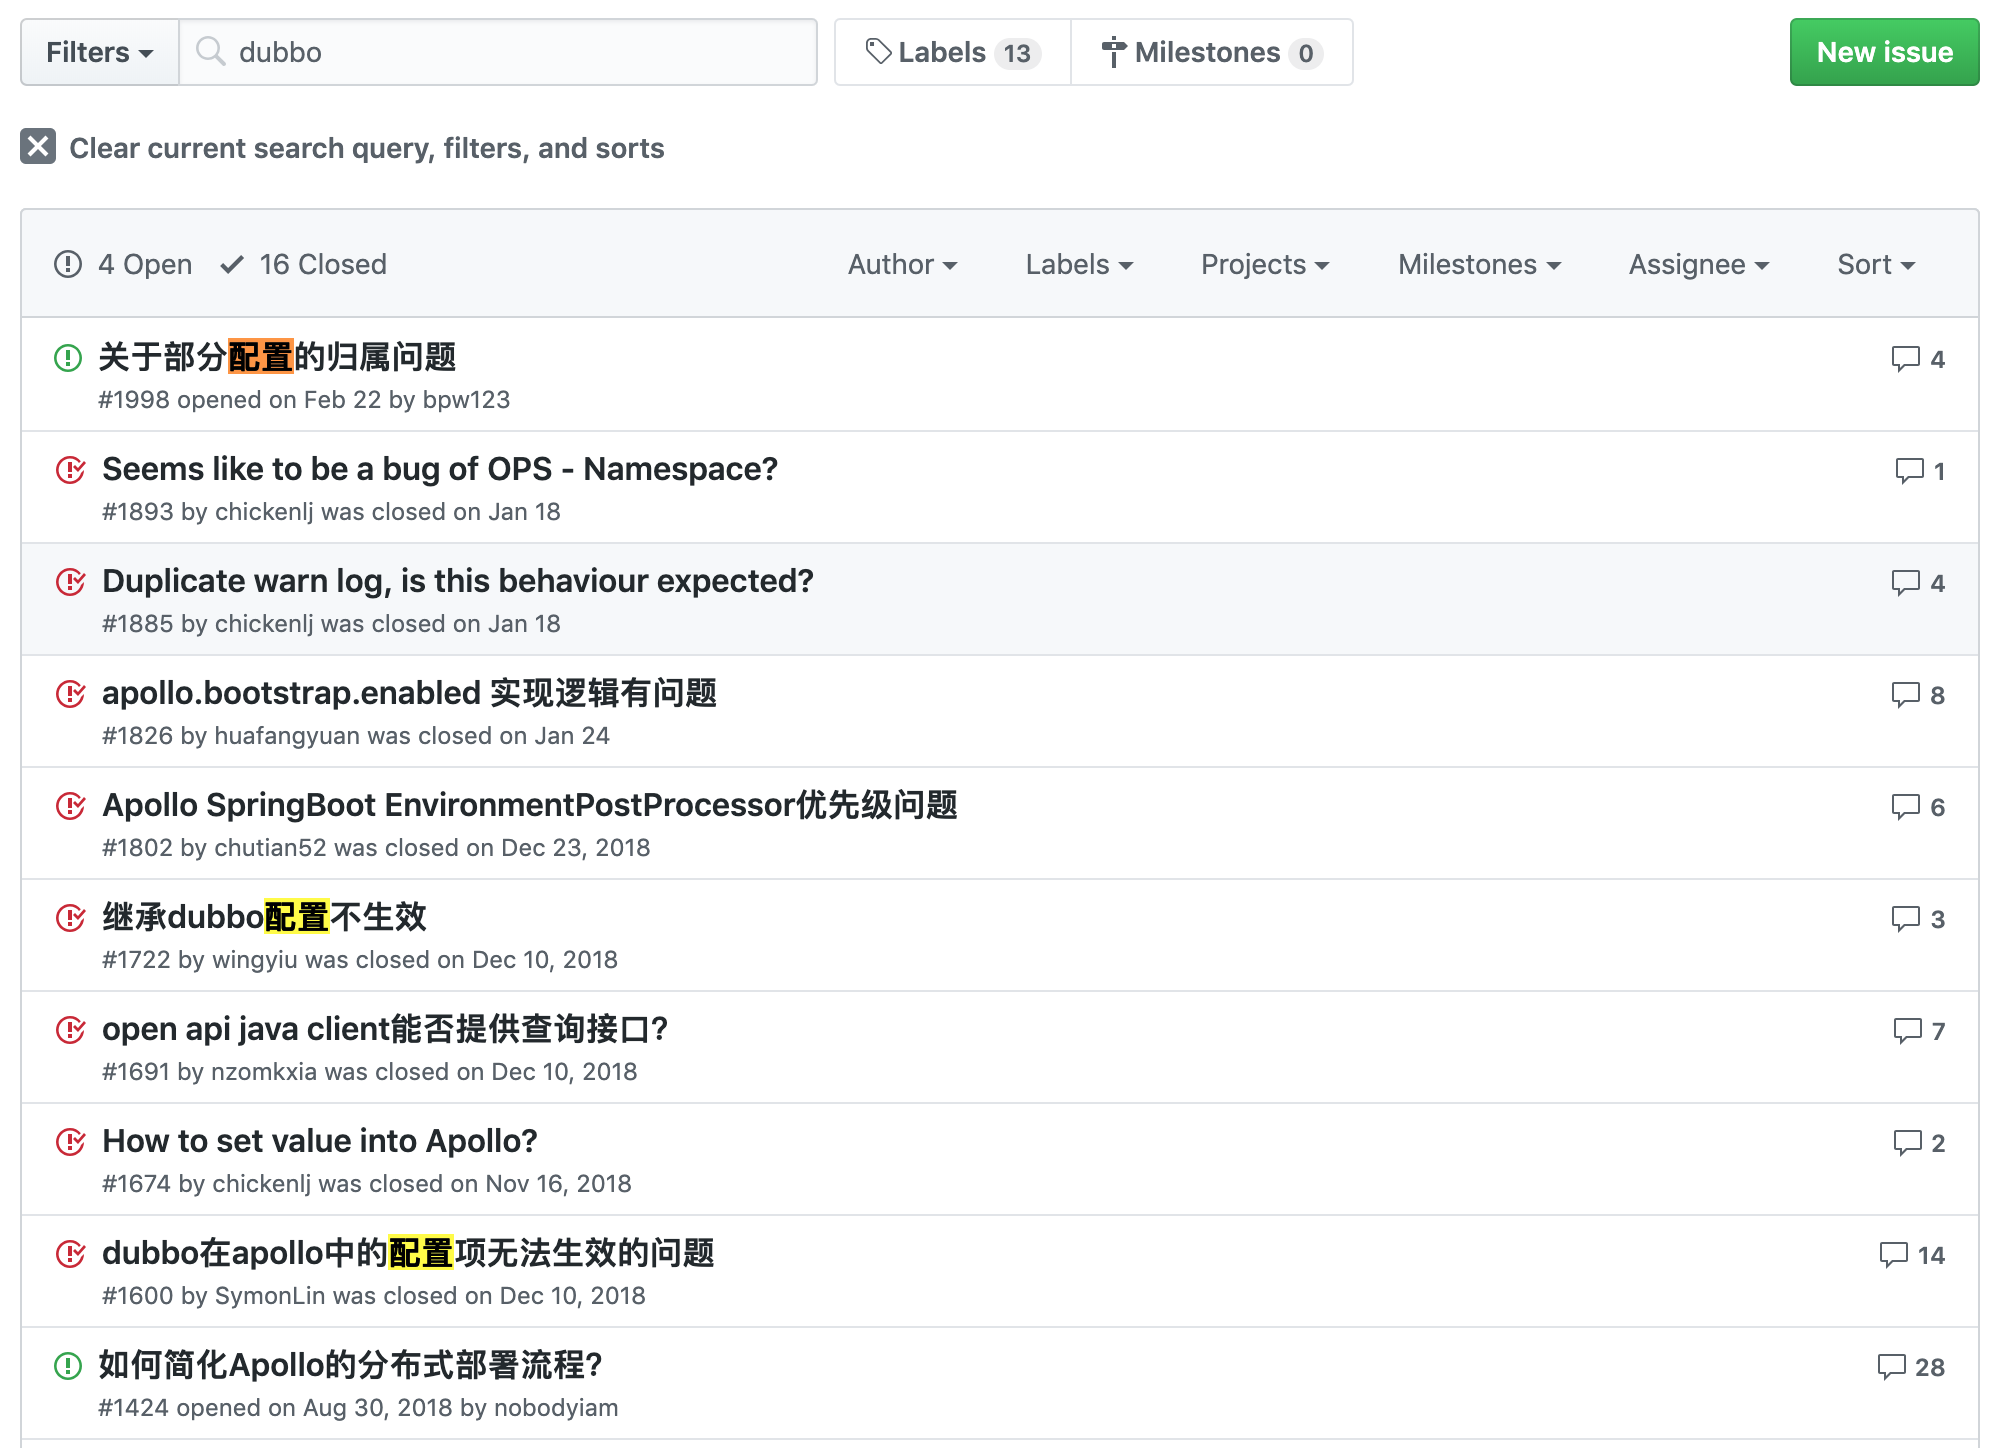
org.springframework.beans.factory.UnsatisfiedDependencyException: Error creating bean with name 'alipayController': Unsatisfied dependency expressed through field 'payService'; nested exception is org.springframework.beans.factory.UnsatisfiedDependencyException: Error creating bean with name 'payServiceImpl': Unsatisfied dependency expressed through field 'commandInvokeService'; nested exception is org.springframework.beans.factory.UnsatisfiedDependencyException: Error creating bean with name 'commandInvokeServiceImpl': Unsatisfied dependency expressed through method 'setCommandMap' parameter 0; nested exception is org.springframework.beans.factory.BeanCreationException: Error creating bean with name 'alipayBatchPayCommand': Injection of resource dependencies failed; nested exception is org.springframework.beans.factory.BeanCreationException: Error creating bean with name 'alipayServiceImpl': Injection of resource dependencies failed; nested exception is org.springframework.beans.factory.BeanCreationException: Error creating bean with name 'dubbo.balconyService': FactoryBean threw exception on object creation; nested exception is java.lang.IllegalStateException: ApplicationConfig.application == null
    at org.springframework.beans.factory.annotation.AutowiredAnnotationBeanPostProcessor$AutowiredFieldElement.inject(AutowiredAnnotationBeanPostProcessor.java:596) ~[spring-beans-5.1.4.RELEASE.jar:5.1.4.RELEASE]
    at org.springframework.beans.factory.annotation.InjectionMetadata.inject(InjectionMetadata.java:90) ~[spring-beans-5.1.4.RELEASE.jar:5.1.4.RELEASE]
    at org.springframework.beans.factory.annotation.AutowiredAnnotationBeanPostProcessor.postProcessProperties(AutowiredAnnotationBeanPostProcessor.java:374) ~[spring-beans-5.1.4.RELEASE.jar:5.1.4.RELEASE]
    at org.springframework.beans.factory.support.AbstractAutowireCapableBeanFactory.populateBean(AbstractAutowireCapableBeanFactory.java:1378) ~[spring-beans-5.1.4.RELEASE.jar:5.1.4.RELEASE]
    at org.springframework.beans.factory.support.AbstractAutowireCapableBeanFactory.doCreateBean(AbstractAutowireCapableBeanFactory.java:575) ~[spring-beans-5.1.4.RELEASE.jar:5.1.4.RELEASE]
    at org.springframework.beans.factory.support.AbstractAutowireCapableBeanFactory.createBean(AbstractAutowireCapableBeanFactory.java:498) ~[spring-beans-5.1.4.RELEASE.jar:5.1.4.RELEASE]
    at org.springframework.beans.factory.support.AbstractBeanFactory.lambda$doGetBean$0(AbstractBeanFactory.java:320) ~[spring-beans-5.1.4.RELEASE.jar:5.1.4.RELEASE]
    at org.springframework.beans.factory.support.DefaultSingletonBeanRegistry.getSingleton(DefaultSingletonBeanRegistry.java:222) ~[spring-beans-5.1.4.RELEASE.jar:5.1.4.RELEASE]
    at org.springframework.beans.factory.support.AbstractBeanFactory.doGetBean(AbstractBeanFactory.java:318) ~[spring-beans-5.1.4.RELEASE.jar:5.1.4.RELEASE]
    at org.springframework.beans.factory.support.AbstractBeanFactory.getBean(AbstractBeanFactory.java:199) ~[spring-beans-5.1.4.RELEASE.jar:5.1.4.RELEASE]
    at org.springframework.beans.factory.support.DefaultListableBeanFactory.preInstantiateSingletons(DefaultListableBeanFactory.java:846) ~[spring-beans-5.1.4.RELEASE.jar:5.1.4.RELEASE]
    at org.springframework.context.support.AbstractApplicationContext.finishBeanFactoryInitialization(AbstractApplicationContext.java:863) ~[spring-context-5.1.4.RELEASE.jar:5.1.4.RELEASE]
    at org.springframework.context.support.AbstractApplicationContext.refresh(AbstractApplicationContext.java:546) ~[spring-context-5.1.4.RELEASE.jar:5.1.4.RELEASE]
    at org.springframework.boot.web.servlet.context.ServletWebServerApplicationContext.refresh(ServletWebServerApplicationContext.java:142) ~[spring-boot-2.1.2.RELEASE.jar:2.1.2.RELEASE]
    at org.springframework.boot.SpringApplication.refresh(SpringApplication.java:775) [spring-boot-2.1.2.RELEASE.jar:2.1.2.RELEASE]
    at org.springframework.boot.SpringApplication.refreshContext(SpringApplication.java:397) [spring-boot-2.1.2.RELEASE.jar:2.1.2.RELEASE]
    at org.springframework.boot.SpringApplication.run(SpringApplication.java:316) [spring-boot-2.1.2.RELEASE.jar:2.1.2.RELEASE]
    at org.springframework.boot.SpringApplication.run(SpringApplication.java:1260) [spring-boot-2.1.2.RELEASE.jar:2.1.2.RELEASE]
    at org.springframework.boot.SpringApplication.run(SpringApplication.java:1248) [spring-boot-2.1.2.RELEASE.jar:2.1.2.RELEASE]
    at com.ezhiyang.pay.PayApplication.main(PayApplication.java:22) [classes/:na]
    at sun.reflect.NativeMethodAccessorImpl.invoke0(Native Method) ~[na:1.8.0_144]
    at sun.reflect.NativeMethodAccessorImpl.invoke(NativeMethodAccessorImpl.java:62) ~[na:1.8.0_144]
    at sun.reflect.DelegatingMethodAccessorImpl.invoke(DelegatingMethodAccessorImpl.java:43) ~[na:1.8.0_144]
    at java.lang.reflect.Method.invoke(Method.java:498) ~[na:1.8.0_144]
    at org.springframework.boot.devtools.restart.RestartLauncher.run(RestartLauncher.java:49) [spring-boot-devtools-2.1.2.RELEASE.jar:2.1.2.RELEASE]
Caused by: org.springframework.beans.factory.UnsatisfiedDependencyException: Error creating bean with name 'payServiceImpl': Unsatisfied dependency expressed through field 'commandInvokeService'; nested exception is org.springframework.beans.factory.UnsatisfiedDependencyException: Error creating bean with name 'commandInvokeServiceImpl': Unsatisfied dependency expressed through method 'setCommandMap' parameter 0; nested exception is org.springframework.beans.factory.BeanCreationException: Error creating bean with name 'alipayBatchPayCommand': Injection of resource dependencies failed; nested exception is org.springframework.beans.factory.BeanCreationException: Error creating bean with name 'alipayServiceImpl': Injection of resource dependencies failed; nested exception is org.springframework.beans.factory.BeanCreationException: Error creating bean with name 'dubbo.balconyService': FactoryBean threw exception on object creation; nested exception is java.lang.IllegalStateException: ApplicationConfig.application == null
    at org.springframework.beans.factory.annotation.AutowiredAnnotationBeanPostProcessor$AutowiredFieldElement.inject(AutowiredAnnotationBeanPostProcessor.java:596) ~[spring-beans-5.1.4.RELEASE.jar:5.1.4.RELEASE]
    at org.springframework.beans.factory.annotation.InjectionMetadata.inject(InjectionMetadata.java:90) ~[spring-beans-5.1.4.RELEASE.jar:5.1.4.RELEASE]
    at org.springframework.beans.factory.annotation.AutowiredAnnotationBeanPostProcessor.postProcessProperties(AutowiredAnnotationBeanPostProcessor.java:374) ~[spring-beans-5.1.4.RELEASE.jar:5.1.4.RELEASE]
    at org.springframework.beans.factory.support.AbstractAutowireCapableBeanFactory.populateBean(AbstractAutowireCapableBeanFactory.java:1378) ~[spring-beans-5.1.4.RELEASE.jar:5.1.4.RELEASE]
    at org.springframework.beans.factory.support.AbstractAutowireCapableBeanFactory.doCreateBean(AbstractAutowireCapableBeanFactory.java:575) ~[spring-beans-5.1.4.RELEASE.jar:5.1.4.RELEASE]
    at org.springframework.beans.factory.support.AbstractAutowireCapableBeanFactory.createBean(AbstractAutowireCapableBeanFactory.java:498) ~[spring-beans-5.1.4.RELEASE.jar:5.1.4.RELEASE]
    at org.springframework.beans.factory.support.AbstractBeanFactory.lambda$doGetBean$0(AbstractBeanFactory.java:320) ~[spring-beans-5.1.4.RELEASE.jar:5.1.4.RELEASE]
    at org.springframework.beans.factory.support.DefaultSingletonBeanRegistry.getSingleton(DefaultSingletonBeanRegistry.java:222) ~[spring-beans-5.1.4.RELEASE.jar:5.1.4.RELEASE]
    at org.springframework.beans.factory.support.AbstractBeanFactory.doGetBean(AbstractBeanFactory.java:318) ~[spring-beans-5.1.4.RELEASE.jar:5.1.4.RELEASE]
    at org.springframework.beans.factory.support.AbstractBeanFactory.getBean(AbstractBeanFactory.java:199) ~[spring-beans-5.1.4.RELEASE.jar:5.1.4.RELEASE]
    at org.springframework.beans.factory.config.DependencyDescriptor.resolveCandidate(DependencyDescriptor.java:277) ~[spring-beans-5.1.4.RELEASE.jar:5.1.4.RELEASE]
    at org.springframework.beans.factory.support.DefaultListableBeanFactory.doResolveDependency(DefaultListableBeanFactory.java:1244) ~[spring-beans-5.1.4.RELEASE.jar:5.1.4.RELEASE]
    at org.springframework.beans.factory.support.DefaultListableBeanFactory.resolveDependency(DefaultListableBeanFactory.java:1164) ~[spring-beans-5.1.4.RELEASE.jar:5.1.4.RELEASE]
    at org.springframework.beans.factory.annotation.AutowiredAnnotationBeanPostProcessor$AutowiredFieldElement.inject(AutowiredAnnotationBeanPostProcessor.java:593) ~[spring-beans-5.1.4.RELEASE.jar:5.1.4.RELEASE]
    ... 24 common frames omitted
Caused by: org.springframework.beans.factory.UnsatisfiedDependencyException: Error creating bean with name 'commandInvokeServiceImpl': Unsatisfied dependency expressed through method 'setCommandMap' parameter 0; nested exception is org.springframework.beans.factory.BeanCreationException: Error creating bean with name 'alipayBatchPayCommand': Injection of resource dependencies failed; nested exception is org.springframework.beans.factory.BeanCreationException: Error creating bean with name 'alipayServiceImpl': Injection of resource dependencies failed; nested exception is org.springframework.beans.factory.BeanCreationException: Error creating bean with name 'dubbo.balconyService': FactoryBean threw exception on object creation; nested exception is java.lang.IllegalStateException: ApplicationConfig.application == null
    at org.springframework.beans.factory.annotation.AutowiredAnnotationBeanPostProcessor$AutowiredMethodElement.inject(AutowiredAnnotationBeanPostProcessor.java:676) ~[spring-beans-5.1.4.RELEASE.jar:5.1.4.RELEASE]
    at org.springframework.beans.factory.annotation.InjectionMetadata.inject(InjectionMetadata.java:90) ~[spring-beans-5.1.4.RELEASE.jar:5.1.4.RELEASE]
    at org.springframework.beans.factory.annotation.AutowiredAnnotationBeanPostProcessor.postProcessProperties(AutowiredAnnotationBeanPostProcessor.java:374) ~[spring-beans-5.1.4.RELEASE.jar:5.1.4.RELEASE]
    at org.springframework.beans.factory.support.AbstractAutowireCapableBeanFactory.populateBean(AbstractAutowireCapableBeanFactory.java:1378) ~[spring-beans-5.1.4.RELEASE.jar:5.1.4.RELEASE]
    at org.springframework.beans.factory.support.AbstractAutowireCapableBeanFactory.doCreateBean(AbstractAutowireCapableBeanFactory.java:575) ~[spring-beans-5.1.4.RELEASE.jar:5.1.4.RELEASE]
    at org.springframework.beans.factory.support.AbstractAutowireCapableBeanFactory.createBean(AbstractAutowireCapableBeanFactory.java:498) ~[spring-beans-5.1.4.RELEASE.jar:5.1.4.RELEASE]
    at org.springframework.beans.factory.support.AbstractBeanFactory.lambda$doGetBean$0(AbstractBeanFactory.java:320) ~[spring-beans-5.1.4.RELEASE.jar:5.1.4.RELEASE]
    at org.springframework.beans.factory.support.DefaultSingletonBeanRegistry.getSingleton(DefaultSingletonBeanRegistry.java:222) ~[spring-beans-5.1.4.RELEASE.jar:5.1.4.RELEASE]
    at org.springframework.beans.factory.support.AbstractBeanFactory.doGetBean(AbstractBeanFactory.java:318) ~[spring-beans-5.1.4.RELEASE.jar:5.1.4.RELEASE]
    at org.springframework.beans.factory.support.AbstractBeanFactory.getBean(AbstractBeanFactory.java:199) ~[spring-beans-5.1.4.RELEASE.jar:5.1.4.RELEASE]
    at org.springframework.beans.factory.config.DependencyDescriptor.resolveCandidate(DependencyDescriptor.java:277) ~[spring-beans-5.1.4.RELEASE.jar:5.1.4.RELEASE]
    at org.springframework.beans.factory.support.DefaultListableBeanFactory.doResolveDependency(DefaultListableBeanFactory.java:1244) ~[spring-beans-5.1.4.RELEASE.jar:5.1.4.RELEASE]
    at org.springframework.beans.factory.support.DefaultListableBeanFactory.resolveDependency(DefaultListableBeanFactory.java:1164) ~[spring-beans-5.1.4.RELEASE.jar:5.1.4.RELEASE]
    at org.springframework.beans.factory.annotation.AutowiredAnnotationBeanPostProcessor$AutowiredFieldElement.inject(AutowiredAnnotationBeanPostProcessor.java:593) ~[spring-beans-5.1.4.RELEASE.jar:5.1.4.RELEASE]
    ... 37 common frames omitted
Caused by: org.springframework.beans.factory.BeanCreationException: Error creating bean with name 'alipayBatchPayCommand': Injection of resource dependencies failed; nested exception is org.springframework.beans.factory.BeanCreationException: Error creating bean with name 'alipayServiceImpl': Injection of resource dependencies failed; nested exception is org.springframework.beans.factory.BeanCreationException: Error creating bean with name 'dubbo.balconyService': FactoryBean threw exception on object creation; nested exception is java.lang.IllegalStateException: ApplicationConfig.application == null
    at org.springframework.context.annotation.CommonAnnotationBeanPostProcessor.postProcessProperties(CommonAnnotationBeanPostProcessor.java:324) ~[spring-context-5.1.4.RELEASE.jar:5.1.4.RELEASE]
    at org.springframework.beans.factory.support.AbstractAutowireCapableBeanFactory.populateBean(AbstractAutowireCapableBeanFactory.java:1378) ~[spring-beans-5.1.4.RELEASE.jar:5.1.4.RELEASE]
    at org.springframework.beans.factory.support.AbstractAutowireCapableBeanFactory.doCreateBean(AbstractAutowireCapableBeanFactory.java:575) ~[spring-beans-5.1.4.RELEASE.jar:5.1.4.RELEASE]
    at org.springframework.beans.factory.support.AbstractAutowireCapableBeanFactory.createBean(AbstractAutowireCapableBeanFactory.java:498) ~[spring-beans-5.1.4.RELEASE.jar:5.1.4.RELEASE]
    at org.springframework.beans.factory.support.AbstractBeanFactory.lambda$doGetBean$0(AbstractBeanFactory.java:320) ~[spring-beans-5.1.4.RELEASE.jar:5.1.4.RELEASE]
    at org.springframework.beans.factory.support.DefaultSingletonBeanRegistry.getSingleton(DefaultSingletonBeanRegistry.java:222) ~[spring-beans-5.1.4.RELEASE.jar:5.1.4.RELEASE]
    at org.springframework.beans.factory.support.AbstractBeanFactory.doGetBean(AbstractBeanFactory.java:318) ~[spring-beans-5.1.4.RELEASE.jar:5.1.4.RELEASE]
    at org.springframework.beans.factory.support.AbstractBeanFactory.getBean(AbstractBeanFactory.java:199) ~[spring-beans-5.1.4.RELEASE.jar:5.1.4.RELEASE]
    at org.springframework.beans.factory.config.DependencyDescriptor.resolveCandidate(DependencyDescriptor.java:277) ~[spring-beans-5.1.4.RELEASE.jar:5.1.4.RELEASE]
    at org.springframework.beans.factory.support.DefaultListableBeanFactory.addCandidateEntry(DefaultListableBeanFactory.java:1460) ~[spring-beans-5.1.4.RELEASE.jar:5.1.4.RELEASE]
    at org.springframework.beans.factory.support.DefaultListableBeanFactory.findAutowireCandidates(DefaultListableBeanFactory.java:1424) ~[spring-beans-5.1.4.RELEASE.jar:5.1.4.RELEASE]
    at org.springframework.beans.factory.support.DefaultListableBeanFactory.resolveMultipleBeans(DefaultListableBeanFactory.java:1315) ~[spring-beans-5.1.4.RELEASE.jar:5.1.4.RELEASE]
    at org.springframework.beans.factory.support.DefaultListableBeanFactory.doResolveDependency(DefaultListableBeanFactory.java:1202) ~[spring-beans-5.1.4.RELEASE.jar:5.1.4.RELEASE]
    at org.springframework.beans.factory.support.DefaultListableBeanFactory.resolveDependency(DefaultListableBeanFactory.java:1164) ~[spring-beans-5.1.4.RELEASE.jar:5.1.4.RELEASE]
    at org.springframework.beans.factory.annotation.AutowiredAnnotationBeanPostProcessor$AutowiredMethodElement.inject(AutowiredAnnotationBeanPostProcessor.java:668) ~[spring-beans-5.1.4.RELEASE.jar:5.1.4.RELEASE]
    ... 50 common frames omitted
Caused by: org.springframework.beans.factory.BeanCreationException: Error creating bean with name 'alipayServiceImpl': Injection of resource dependencies failed; nested exception is org.springframework.beans.factory.BeanCreationException: Error creating bean with name 'dubbo.balconyService': FactoryBean threw exception on object creation; nested exception is java.lang.IllegalStateException: ApplicationConfig.application == null
    at org.springframework.context.annotation.CommonAnnotationBeanPostProcessor.postProcessProperties(CommonAnnotationBeanPostProcessor.java:324) ~[spring-context-5.1.4.RELEASE.jar:5.1.4.RELEASE]
    at org.springframework.beans.factory.support.AbstractAutowireCapableBeanFactory.populateBean(AbstractAutowireCapableBeanFactory.java:1378) ~[spring-beans-5.1.4.RELEASE.jar:5.1.4.RELEASE]
    at org.springframework.beans.factory.support.AbstractAutowireCapableBeanFactory.doCreateBean(AbstractAutowireCapableBeanFactory.java:575) ~[spring-beans-5.1.4.RELEASE.jar:5.1.4.RELEASE]
    at org.springframework.beans.factory.support.AbstractAutowireCapableBeanFactory.createBean(AbstractAutowireCapableBeanFactory.java:498) ~[spring-beans-5.1.4.RELEASE.jar:5.1.4.RELEASE]
    at org.springframework.beans.factory.support.AbstractBeanFactory.lambda$doGetBean$0(AbstractBeanFactory.java:320) ~[spring-beans-5.1.4.RELEASE.jar:5.1.4.RELEASE]
    at org.springframework.beans.factory.support.DefaultSingletonBeanRegistry.getSingleton(DefaultSingletonBeanRegistry.java:222) ~[spring-beans-5.1.4.RELEASE.jar:5.1.4.RELEASE]
    at org.springframework.beans.factory.support.AbstractBeanFactory.doGetBean(AbstractBeanFactory.java:318) ~[spring-beans-5.1.4.RELEASE.jar:5.1.4.RELEASE]
    at org.springframework.beans.factory.support.AbstractBeanFactory.getBean(AbstractBeanFactory.java:199) ~[spring-beans-5.1.4.RELEASE.jar:5.1.4.RELEASE]
    at org.springframework.beans.factory.config.DependencyDescriptor.resolveCandidate(DependencyDescriptor.java:277) ~[spring-beans-5.1.4.RELEASE.jar:5.1.4.RELEASE]
    at org.springframework.beans.factory.support.DefaultListableBeanFactory.doResolveDependency(DefaultListableBeanFactory.java:1244) ~[spring-beans-5.1.4.RELEASE.jar:5.1.4.RELEASE]
    at org.springframework.beans.factory.support.DefaultListableBeanFactory.resolveDependency(DefaultListableBeanFactory.java:1164) ~[spring-beans-5.1.4.RELEASE.jar:5.1.4.RELEASE]
    at org.springframework.context.annotation.CommonAnnotationBeanPostProcessor.autowireResource(CommonAnnotationBeanPostProcessor.java:518) ~[spring-context-5.1.4.RELEASE.jar:5.1.4.RELEASE]
    at org.springframework.context.annotation.CommonAnnotationBeanPostProcessor.getResource(CommonAnnotationBeanPostProcessor.java:496) ~[spring-context-5.1.4.RELEASE.jar:5.1.4.RELEASE]
    at org.springframework.context.annotation.CommonAnnotationBeanPostProcessor$ResourceElement.getResourceToInject(CommonAnnotationBeanPostProcessor.java:630) ~[spring-context-5.1.4.RELEASE.jar:5.1.4.RELEASE]
    at org.springframework.beans.factory.annotation.InjectionMetadata$InjectedElement.inject(InjectionMetadata.java:180) ~[spring-beans-5.1.4.RELEASE.jar:5.1.4.RELEASE]
    at org.springframework.beans.factory.annotation.InjectionMetadata.inject(InjectionMetadata.java:90) ~[spring-beans-5.1.4.RELEASE.jar:5.1.4.RELEASE]
    at org.springframework.context.annotation.CommonAnnotationBeanPostProcessor.postProcessProperties(CommonAnnotationBeanPostProcessor.java:321) ~[spring-context-5.1.4.RELEASE.jar:5.1.4.RELEASE]
    ... 64 common frames omitted
Caused by: org.springframework.beans.factory.BeanCreationException: Error creating bean with name 'dubbo.balconyService': FactoryBean threw exception on object creation; nested exception is java.lang.IllegalStateException: ApplicationConfig.application == null
    at org.springframework.beans.factory.support.FactoryBeanRegistrySupport.doGetObjectFromFactoryBean(FactoryBeanRegistrySupport.java:178) ~[spring-beans-5.1.4.RELEASE.jar:5.1.4.RELEASE]
    at org.springframework.beans.factory.support.FactoryBeanRegistrySupport.getObjectFromFactoryBean(FactoryBeanRegistrySupport.java:101) ~[spring-beans-5.1.4.RELEASE.jar:5.1.4.RELEASE]
    at org.springframework.beans.factory.support.AbstractBeanFactory.getObjectForBeanInstance(AbstractBeanFactory.java:1674) ~[spring-beans-5.1.4.RELEASE.jar:5.1.4.RELEASE]
    at org.springframework.beans.factory.support.AbstractAutowireCapableBeanFactory.getObjectForBeanInstance(AbstractAutowireCapableBeanFactory.java:1216) ~[spring-beans-5.1.4.RELEASE.jar:5.1.4.RELEASE]
    at org.springframework.beans.factory.support.AbstractBeanFactory.doGetBean(AbstractBeanFactory.java:257) ~[spring-beans-5.1.4.RELEASE.jar:5.1.4.RELEASE]
    at org.springframework.beans.factory.support.AbstractBeanFactory.getBean(AbstractBeanFactory.java:204) ~[spring-beans-5.1.4.RELEASE.jar:5.1.4.RELEASE]
    at org.springframework.context.annotation.CommonAnnotationBeanPostProcessor.autowireResource(CommonAnnotationBeanPostProcessor.java:525) ~[spring-context-5.1.4.RELEASE.jar:5.1.4.RELEASE]
    at org.springframework.context.annotation.CommonAnnotationBeanPostProcessor.getResource(CommonAnnotationBeanPostProcessor.java:496) ~[spring-context-5.1.4.RELEASE.jar:5.1.4.RELEASE]
    at org.springframework.context.annotation.CommonAnnotationBeanPostProcessor$ResourceElement.getResourceToInject(CommonAnnotationBeanPostProcessor.java:630) ~[spring-context-5.1.4.RELEASE.jar:5.1.4.RELEASE]
    at org.springframework.beans.factory.annotation.InjectionMetadata$InjectedElement.inject(InjectionMetadata.java:180) ~[spring-beans-5.1.4.RELEASE.jar:5.1.4.RELEASE]
    at org.springframework.beans.factory.annotation.InjectionMetadata.inject(InjectionMetadata.java:90) ~[spring-beans-5.1.4.RELEASE.jar:5.1.4.RELEASE]
    at org.springframework.context.annotation.CommonAnnotationBeanPostProcessor.postProcessProperties(CommonAnnotationBeanPostProcessor.java:321) ~[spring-context-5.1.4.RELEASE.jar:5.1.4.RELEASE]
    ... 80 common frames omitted
Caused by: java.lang.IllegalStateException: ApplicationConfig.application == null
    at com.alibaba.dubbo.config.AbstractConfig.appendParameters(AbstractConfig.java:246) ~[dubbo-2.6.2.jar:2.6.2]
    at com.alibaba.dubbo.config.AbstractConfig.appendParameters(AbstractConfig.java:181) ~[dubbo-2.6.2.jar:2.6.2]
    at com.alibaba.dubbo.config.ReferenceConfig.init(ReferenceConfig.java:303) ~[dubbo-2.6.2.jar:2.6.2]
    at com.alibaba.dubbo.config.ReferenceConfig.get(ReferenceConfig.java:163) ~[dubbo-2.6.2.jar:2.6.2]
    at com.alibaba.dubbo.config.spring.ReferenceBean.getObject(ReferenceBean.java:66) ~[dubbo-2.6.2.jar:2.6.2]
    at org.springframework.beans.factory.support.FactoryBeanRegistrySupport.doGetObjectFromFactoryBean(FactoryBeanRegistrySupport.java:171) ~[spring-beans-5.1.4.RELEASE.jar:5.1.4.RELEASE]
    ... 91 common frames omitted
Caused by: java.lang.IllegalStateException: ApplicationConfig.application == null
    at com.alibaba.dubbo.config.AbstractConfig.appendParameters(AbstractConfig.java:231) ~[dubbo-2.6.2.jar:2.6.2]
    ... 96 common frames omitted
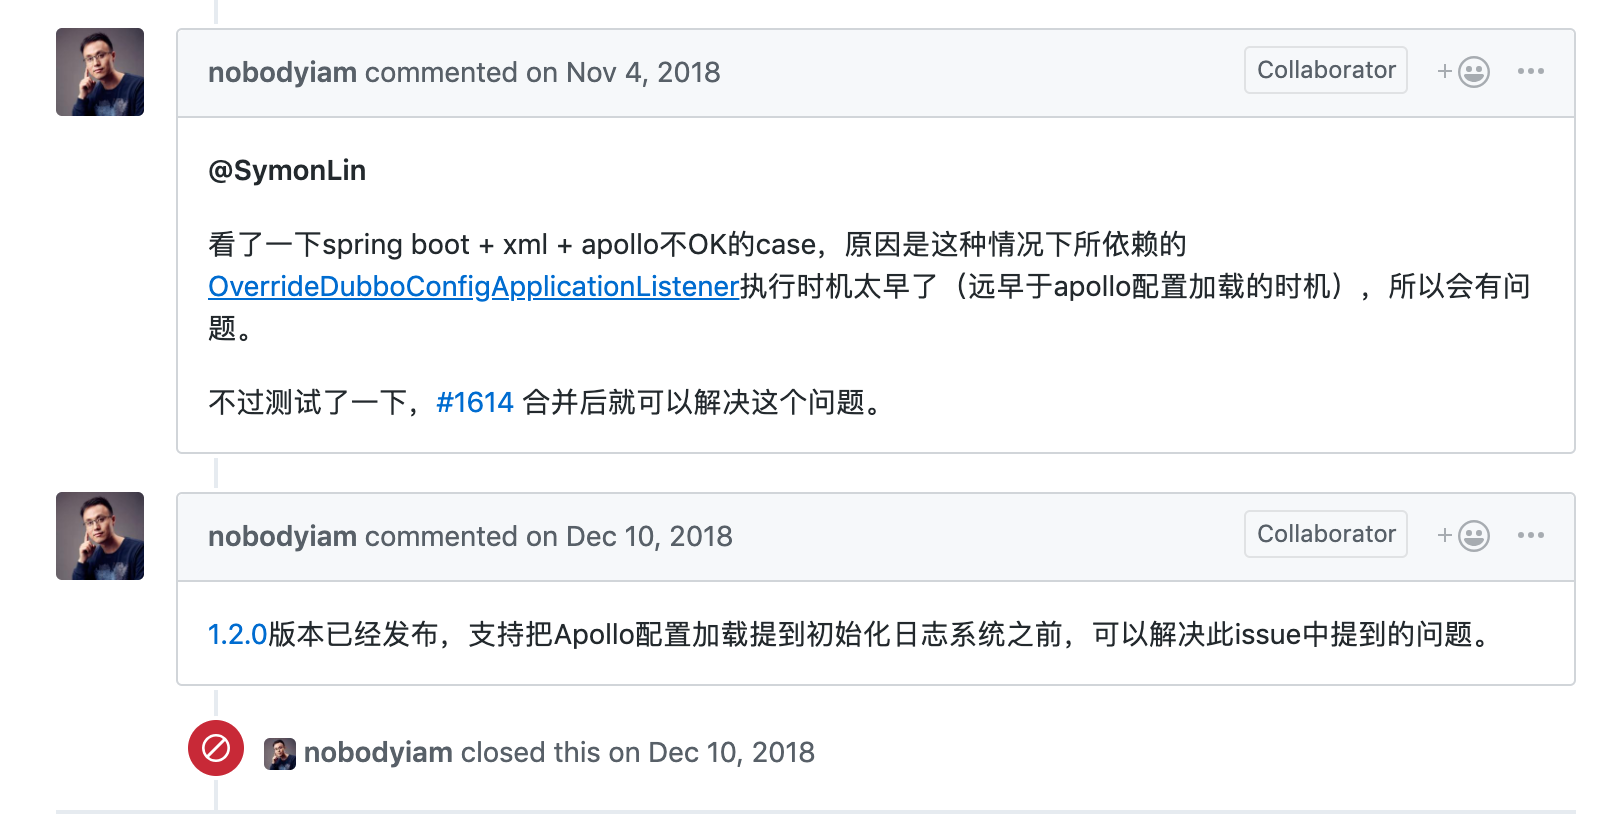 解决问题总耗时 30 分钟左右。